
This KB will cover how to use the reserved weight (also called random weight) functionality. This plugin is provided by a plugin that we provide called “Enhanced Weight Based Pricing for WooCommerce“.
Navigate to a product and click “edit”. In the “product data” section you will see the “General” tab.
In our example, let’s say we are setting up the info for a “Tri Tip Sirloin”. This item is sold by the pound and has minimum weight that can be 2 lbs and max. weight of 4 lbs.
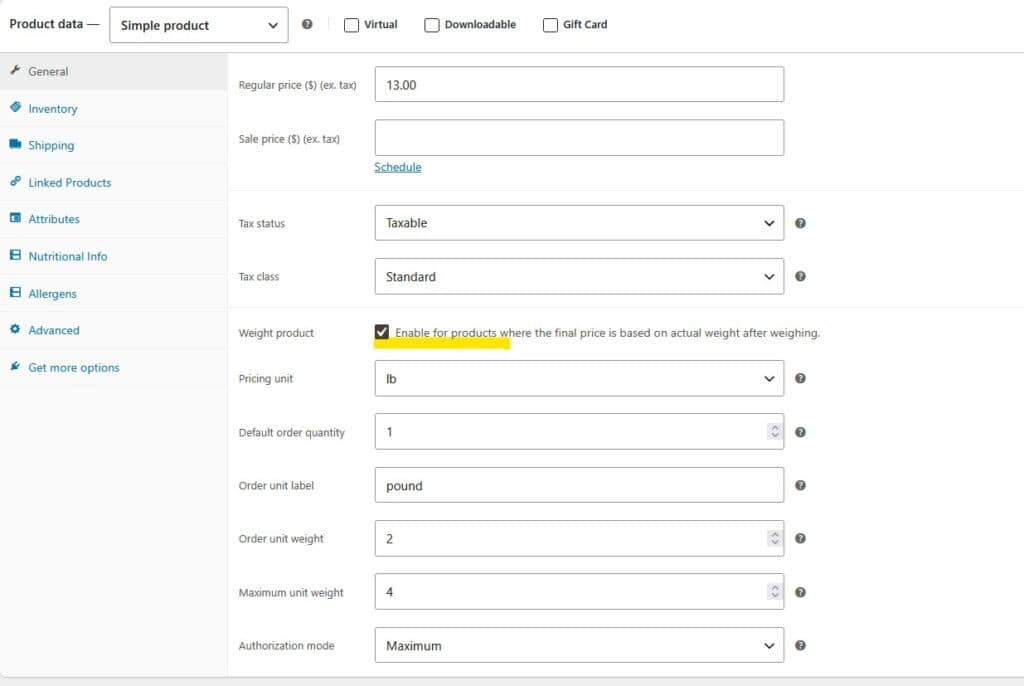
-Enter the regular and sale price (if applicable) information
-Check the setting Enable for products where the final price is based on actual weight after weighing.
-The pricing unit should be set on pounds (‘lb’)
-The default order quantity is normally set to 1; this tells Woo how many items is in one packaging unit
-The order unit label is what shows up on the product, checkout, and cart screens; it could be changed to any other text that is needed if you were selling by the crate, box, etc.
-The order unit weight is the minimum weight that this item can be (2 lbs. in our example)
-The maximum unit weight is the maximum weight that this item can be (2 lbs. in our example); Note: You will not be able to charge any amount to the customer that exceeds the maximum weight amount defined here
–Authorization mode should be set to Maximum if you want the credit card pre-authorization and capture process to occur where the customer is charged only according to the adjusted weight; don’t change this value if you want the pre-authorization to occur
Note: If you don’t need to use the maximum authorization mode, you most likely will not need to have this product marked as weighted item (weight product unchecked).
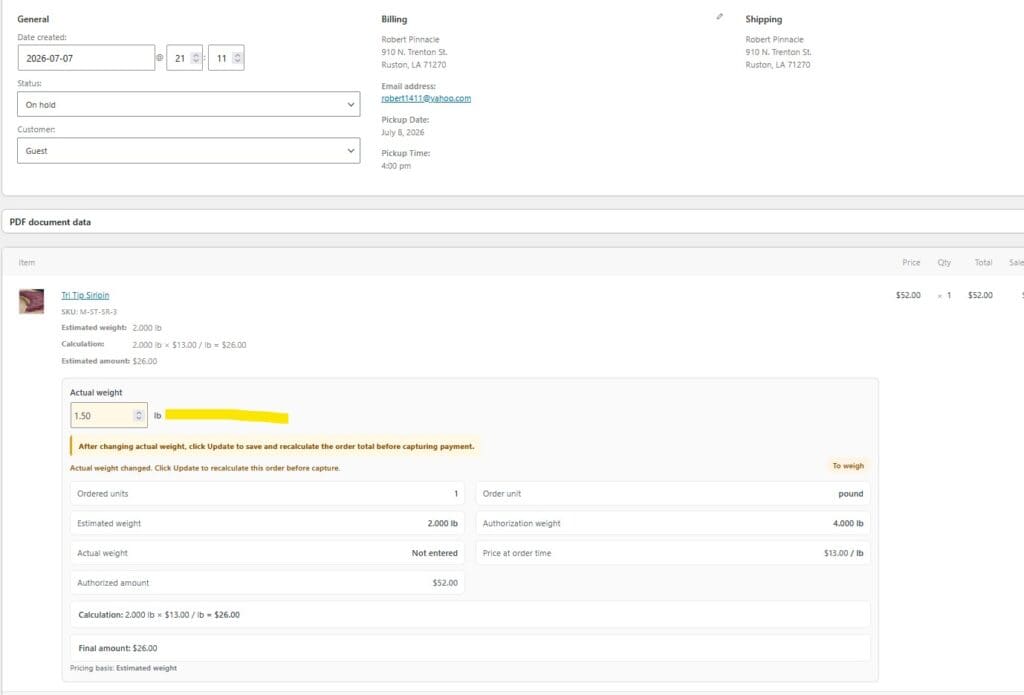
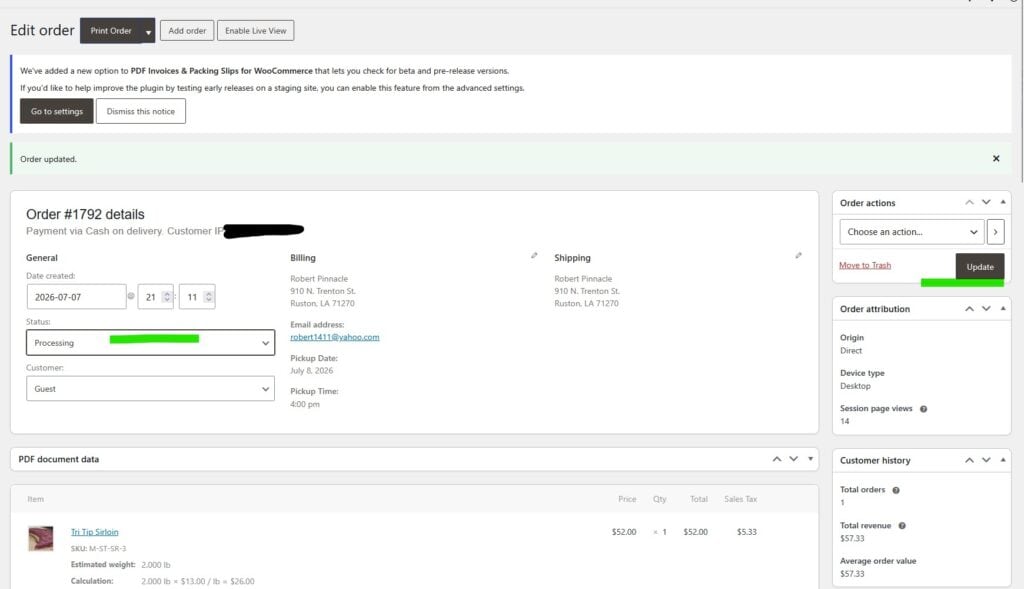
Watch the video here: How To Process a Weight Reserved Order
Additional Note: All order information in screenshots are not real and are only shown as an example from a test system.
If you have any questions, please reach out to us.